How to Draw a Cow Easy Step by Step
Cows have been at our sides for thousands of years as a vital part of farming and agriculture.
These gentle animals also come in many different varieties, with different color schemes, patterns and body types.
Because of their distinctive look and many different color schemes, cows have been a favorite subject for artists for many years.
If you would also like to create a cow artwork, you are probably wondering how you can learn how to draw a cow.
We created this step-by-step guide on how to draw a cow to make it so that you can learn to do it yourself in no time!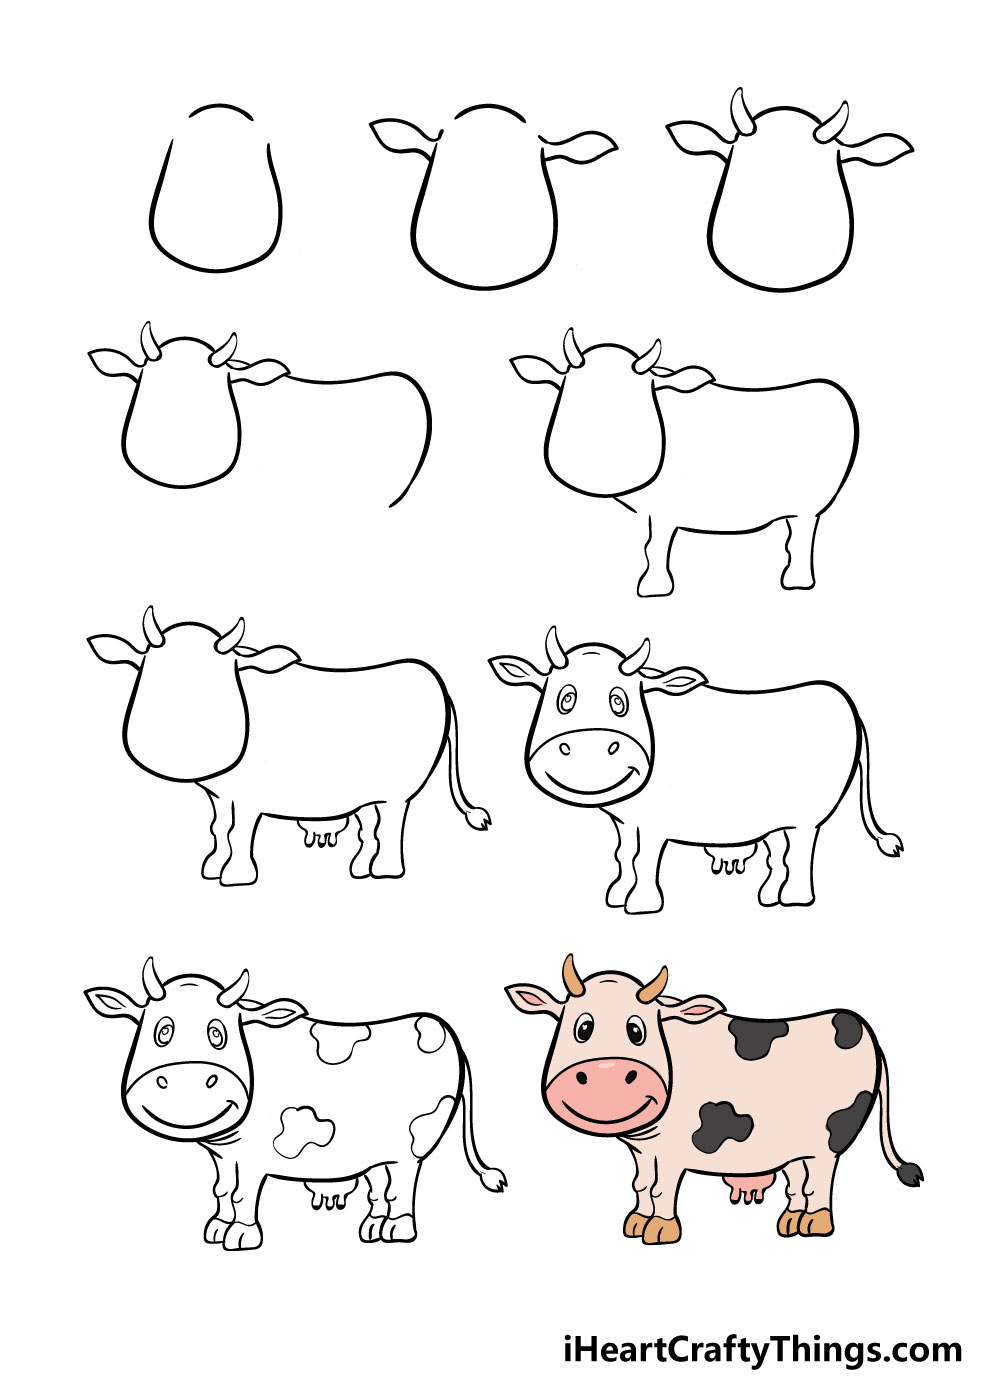
What's in this Blog Post
- How to Draw A Cow – Let's get Started!
- Step 1
- Step 2 – Next, draw in the ears
- Step 3 – Now, draw in the cow's horns
- Step 4 – Next, draw in the cow's body
- Step 5 – Add in the legs and belly
- Step 6 – Next, draw in the legs, udder and tail
- Step 7 – Next, draw in the face of your cow
- Step 8 – Draw in the spots and other details
- Step 9 – Now finish it off with some color
- 3 More tips to make your cow drawing easy!
- Your Cow Drawing is Complete
How to Draw A Cow – Let's get Started!
Step 1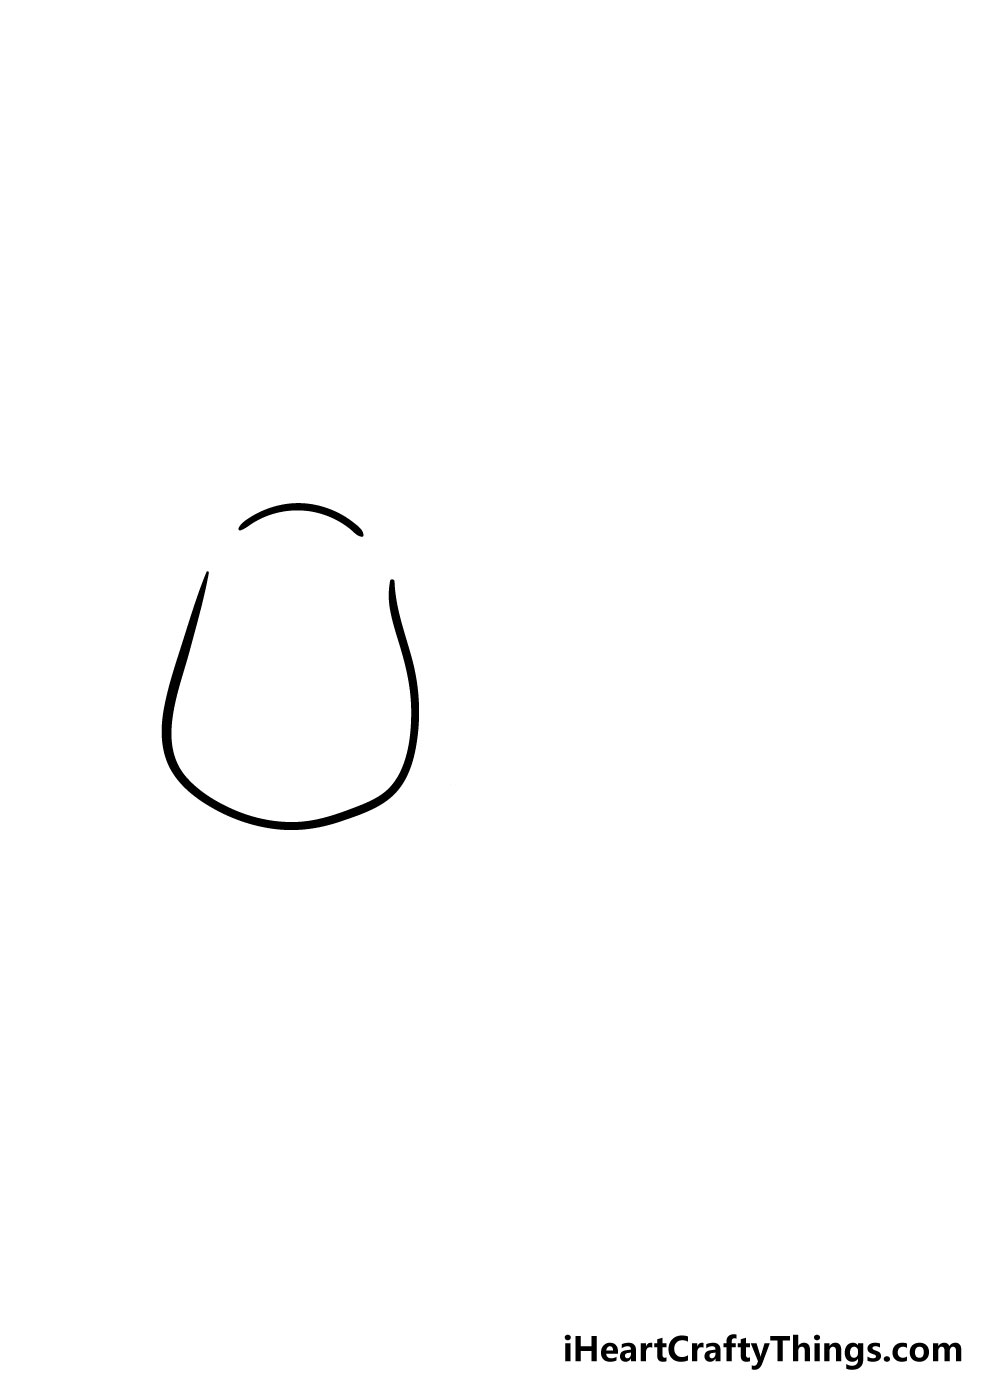
For the first step in this guide on how to draw a cow, we will be starting with the outline of the head. To do this, we will start by drawing a long, curved line that will look like a stretched U.
Once you have that line in, you can draw another much smaller curved line above it, making sure to leave a little space between both lines, as you will be adding in the ears and horns at those spaces.
Step 2 – Next, draw in the ears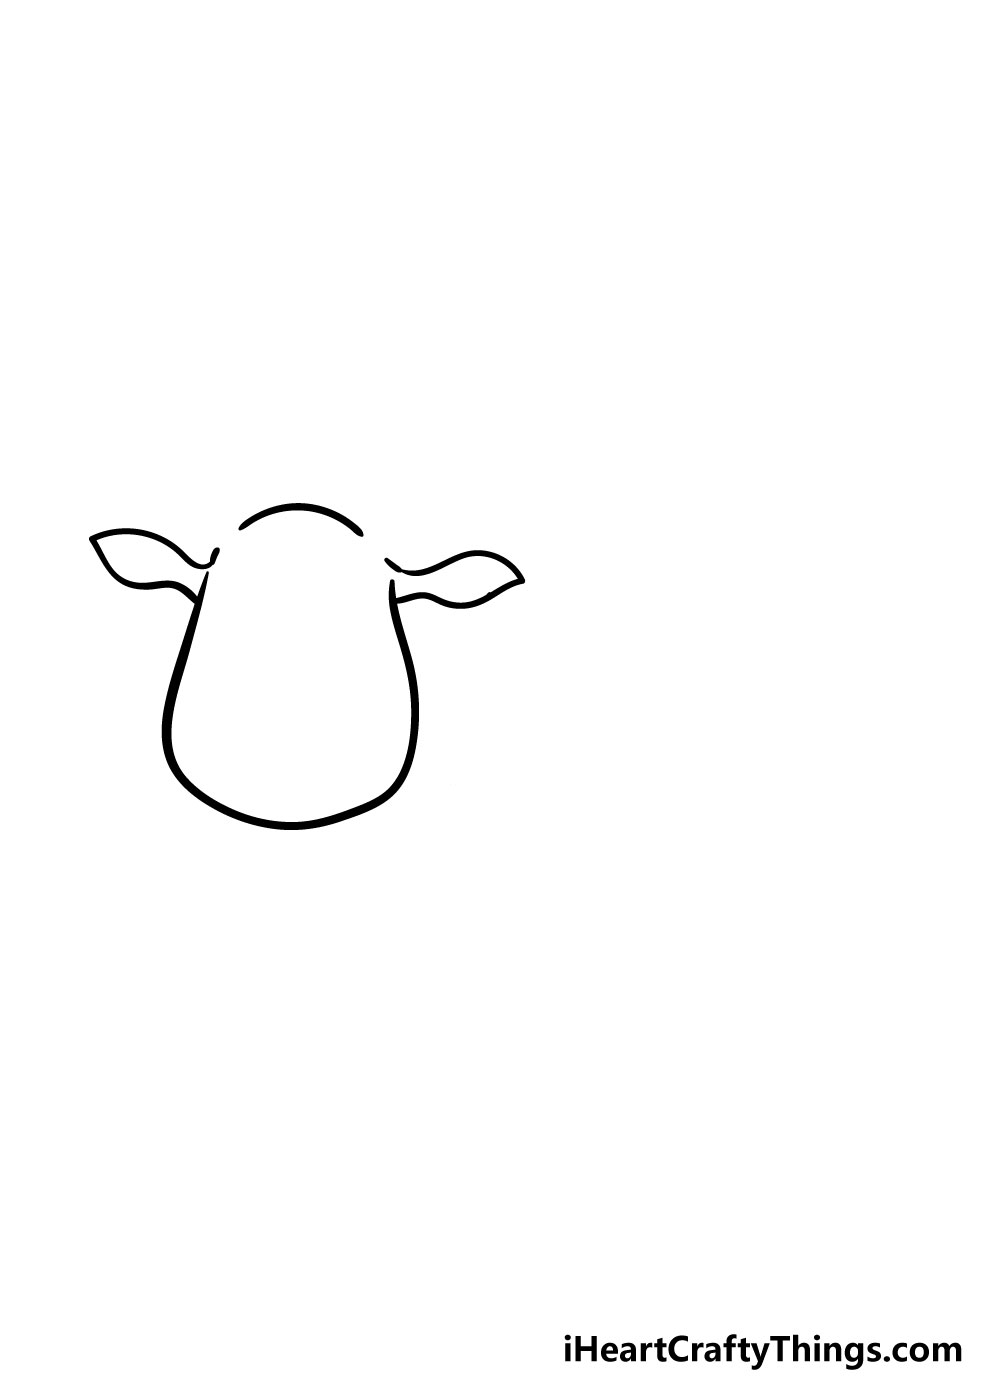
In the second step of your cow drawing, you will be adding in some ears to your cow. Just below the spaces that we left between the lines earlier, you can draw in the distinctive cow ear shapes.
These are thin at the base and get thicker the further they go out, as you can see in the reference image.
Step 3 – Now, draw in the cow's horns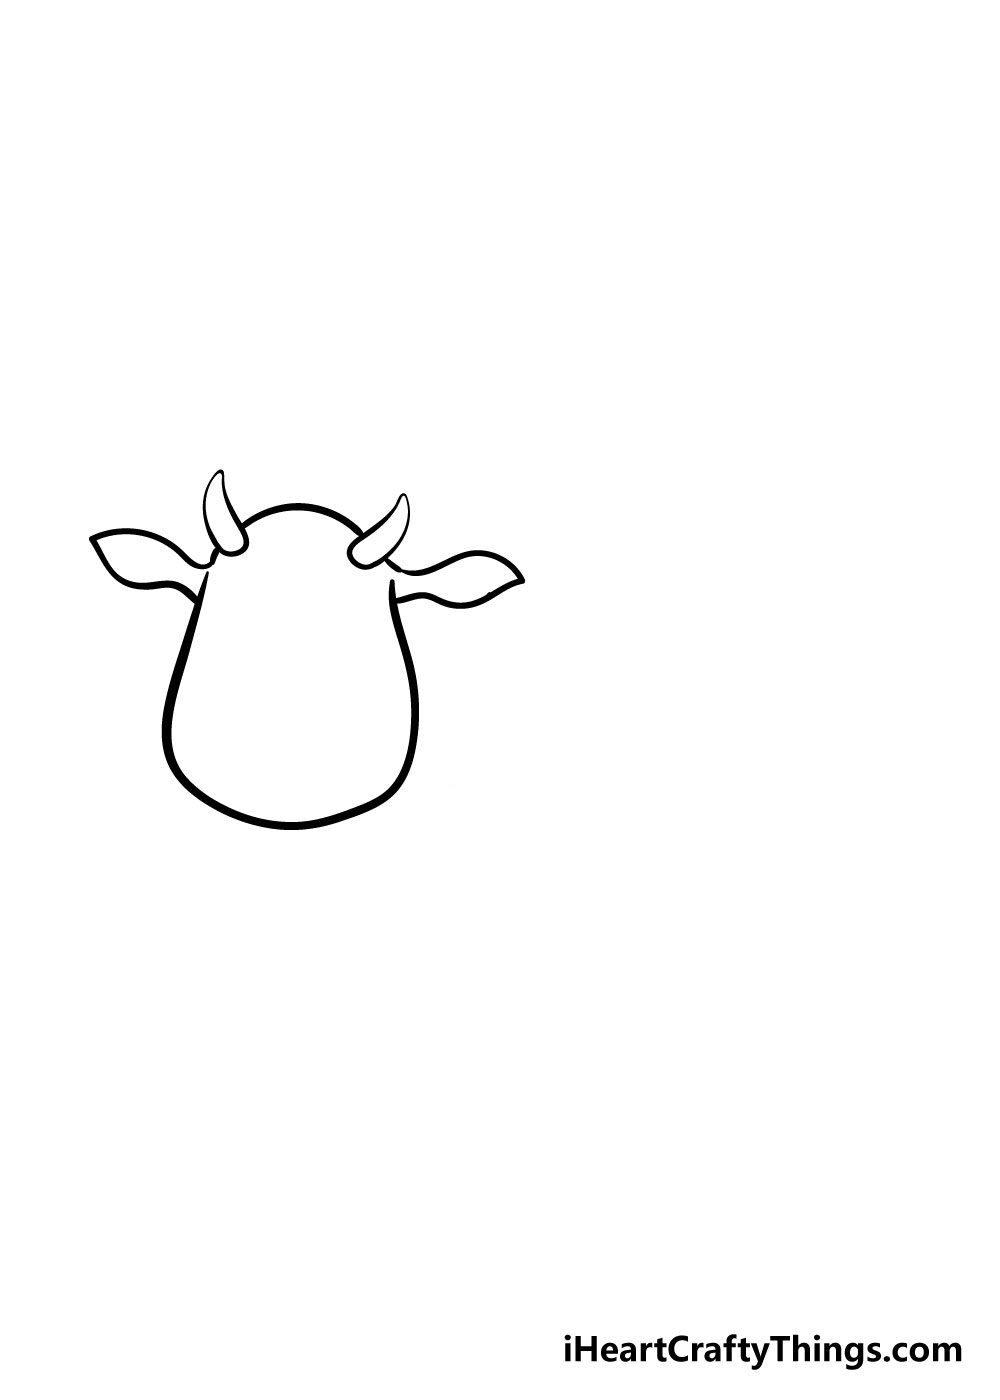
Now that we have the ears of your cow drawn in, you can add in the small horns in the space you left for them earlier.
You can draw in the horns using some curved lines that end in a sharp point like you see in the picture.
Step 4 – Next, draw in the cow's body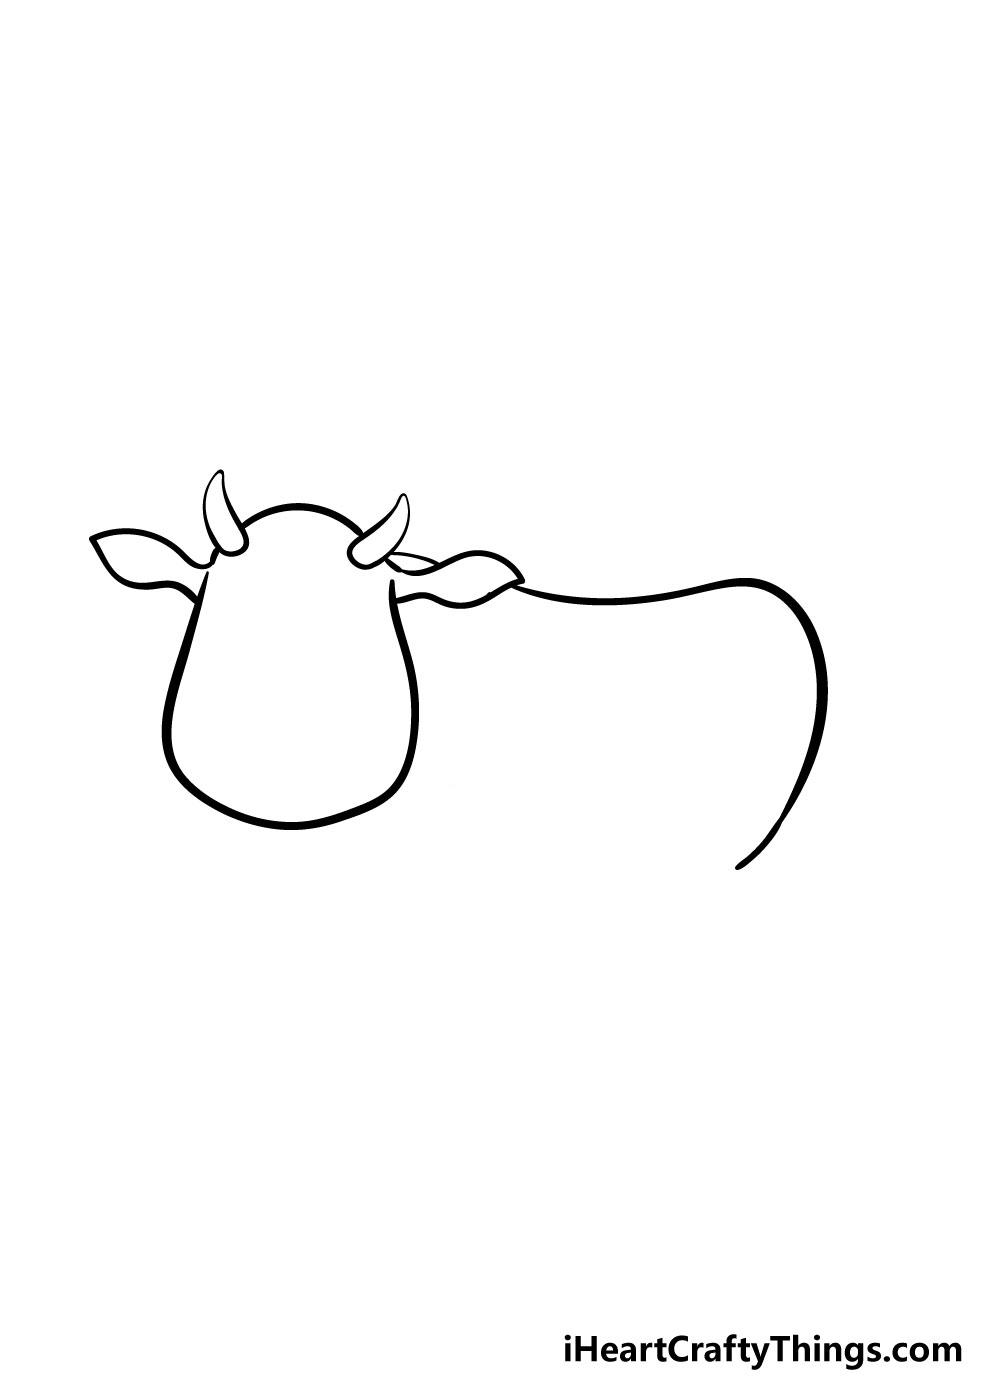
For the next step in this guide on how to draw a cow, you can add in the top of the body.
To do this, we will be using a line coming from the head that curves slightly in the middle and then curves down strongly to form the back end of the cow.
Step 5 – Add in the legs and belly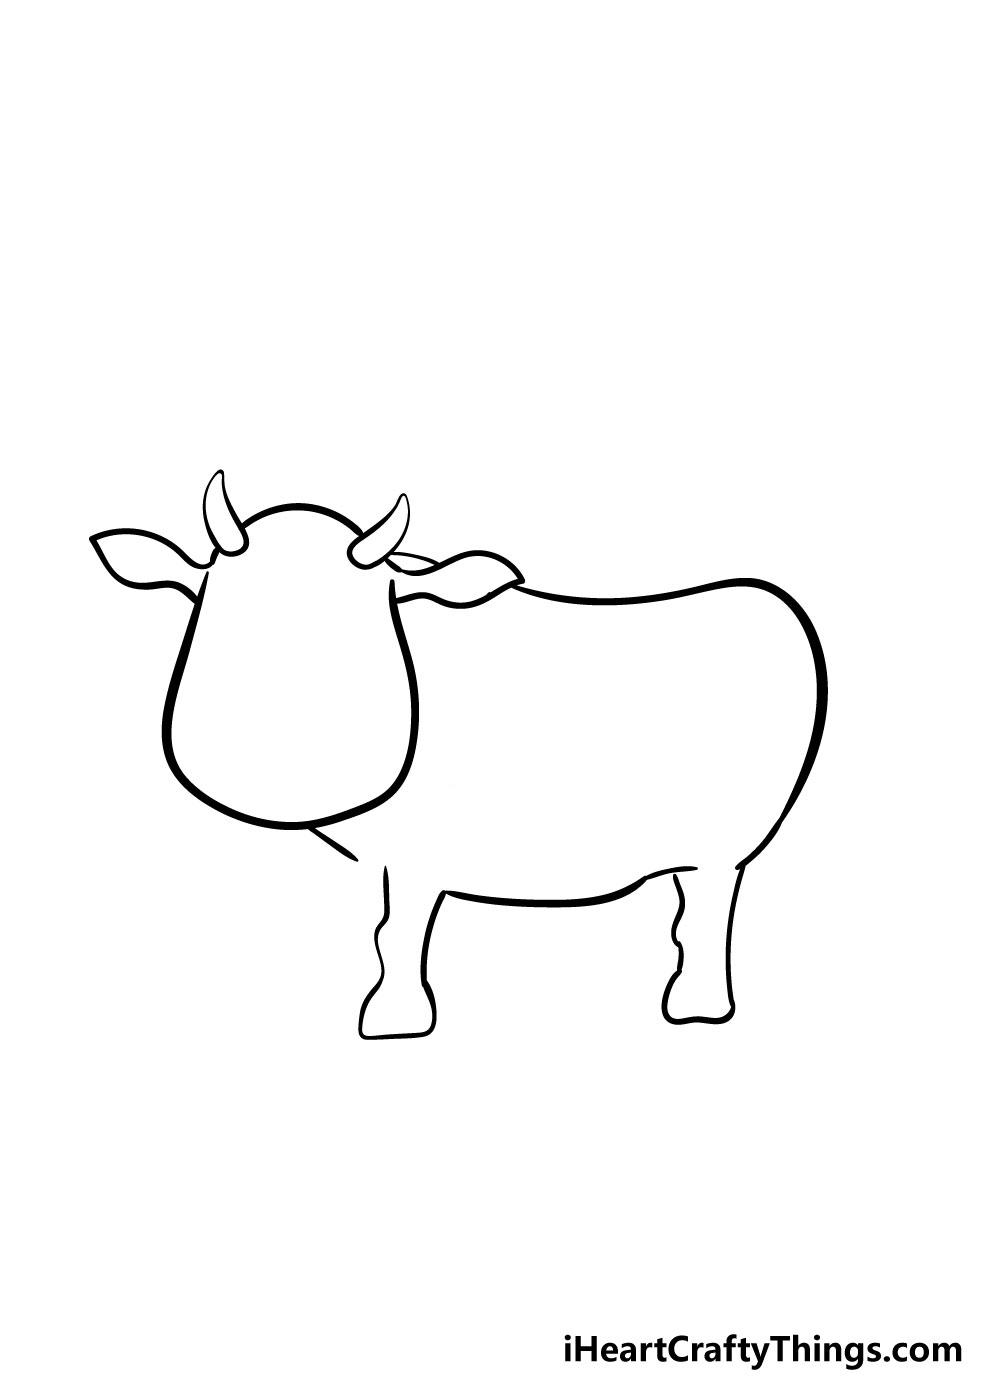
Your cow drawing is really starting to take shape now! For this next step, we will be focusing on two of the legs and the belly of your cow.
Using some more curved lines, you can add in the neck and then the leg portions as you see them in the picture. For now, we will be leaving a space between the chest and the leg on our left.
Step 6 – Next, draw in the legs, udder and tail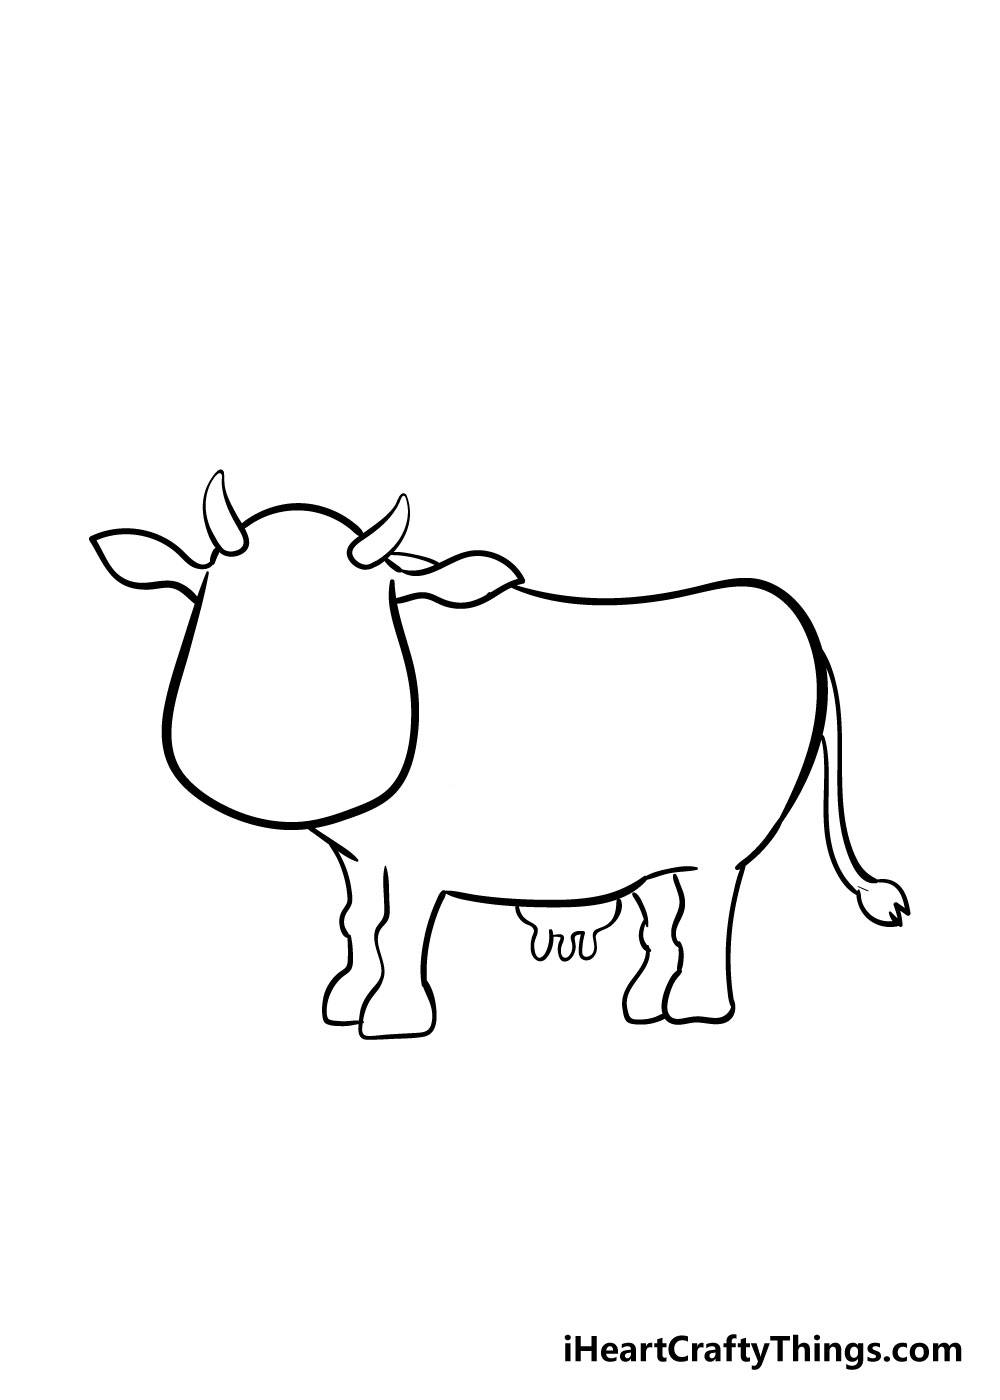
To draw in the other legs of your cow drawing, you can draw in smaller versions of the legs that you drew in the previous step.
Once you have all the legs in, you can draw in the udder and tail as they appear in the reference picture.
Step 7 – Next, draw in the face of your cow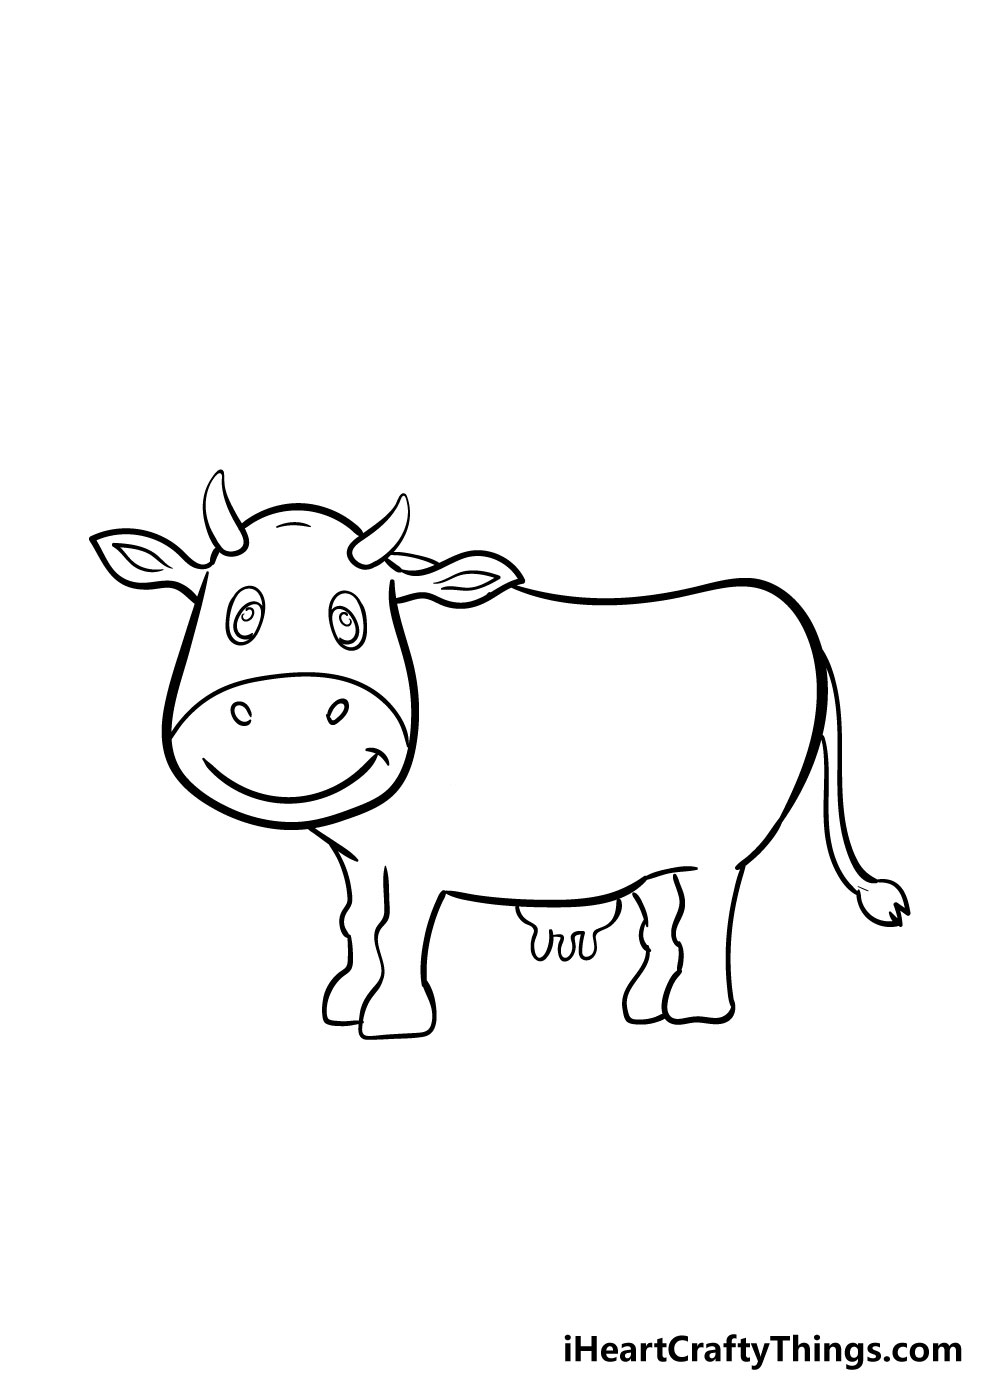
Your cow drawing needs a happy face, so we will be drawing in a cute face for your cow in this step!
We've shown you one way you could draw it in using some curved lines and circular shapes in the reference picture.
You could draw in the face of your cow as it appears in our image, or you could change up some elements to create a unique face for your drawing!
Step 8 – Draw in the spots and other details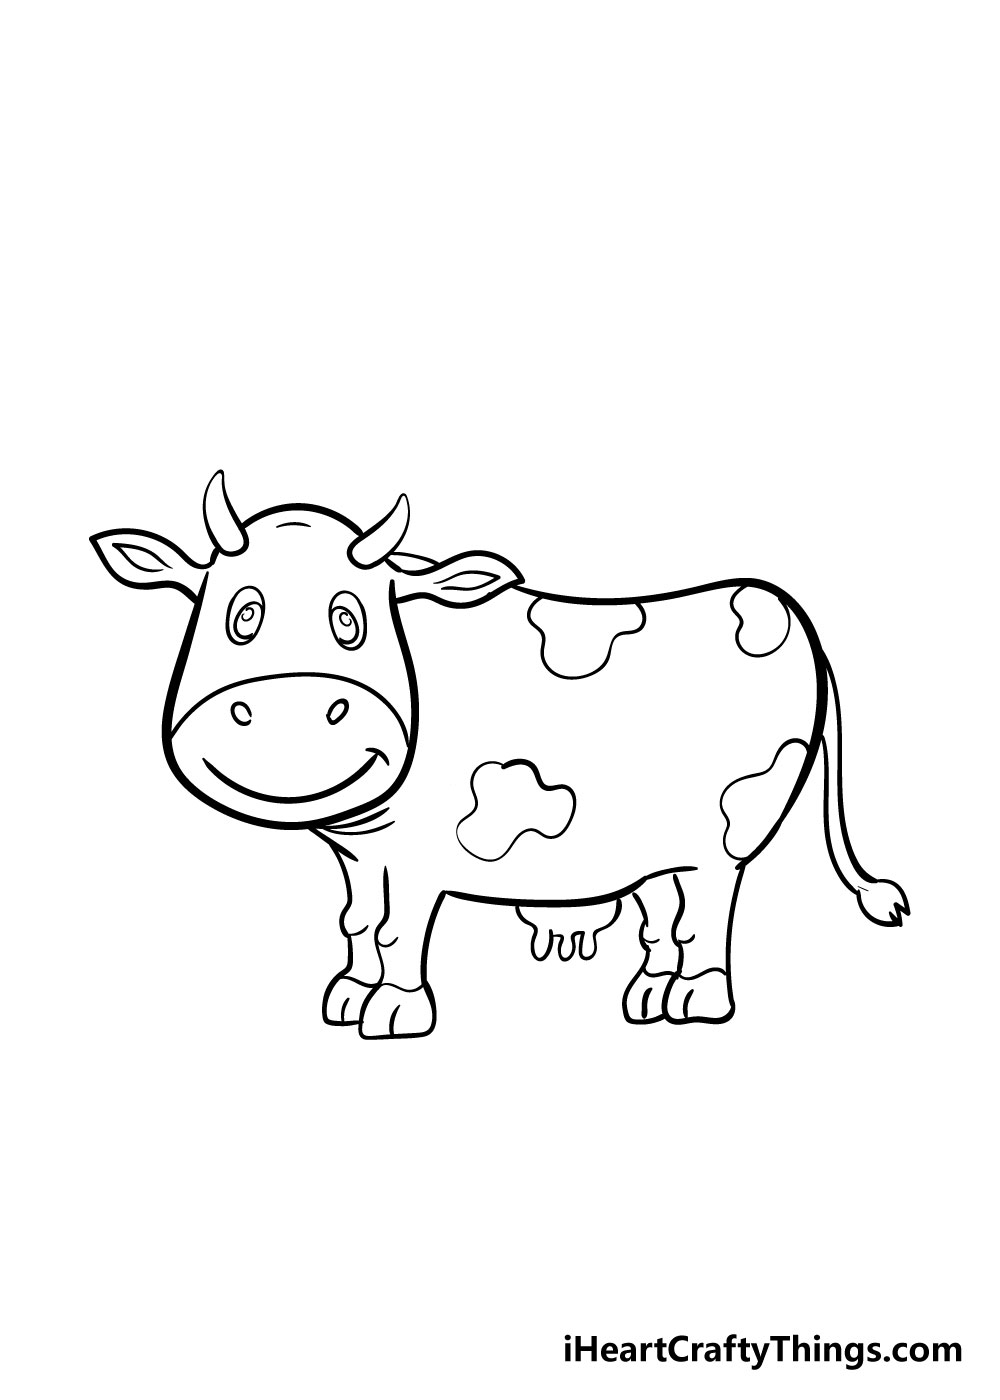
Every cow needs some spots, and that's what we will be adding along with some final details for your cow drawing! Simply draw in a few irregular shapes as you see them in the picture.
You can also change the positions of the spots if you prefer! Once you're happy with how the spots look, you can add in some final details.
These include lines under the head, at the knees and above the hooves for some details to finish off your cow drawing!
Step 9 – Now finish it off with some color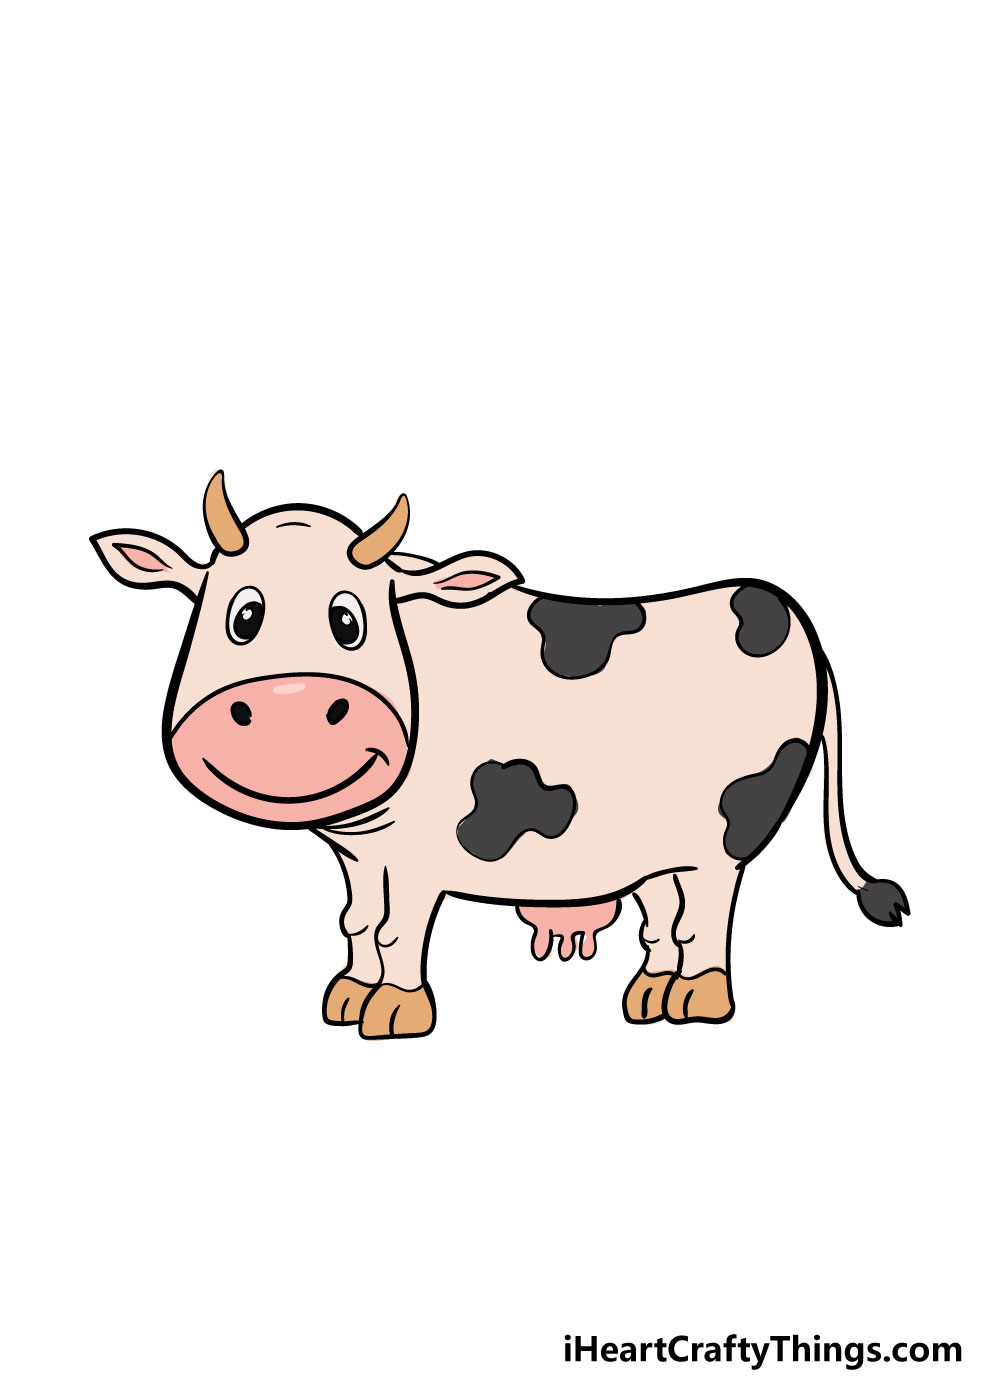
With those final details added in, you have successfully learned how to draw a cow! While the drawing may be complete, there's still one more step to complete.
Luckily, it's a really fun step! For the final step, you get to unleash your creativity with your favorite colors.
We have shown one way you could color in your cow drawing in the reference picture, but for this stage, you should let your imagination run wild and use whichever colors make you happy!
You could also draw in a nice background for your cow drawing as well if you're feeling extra creative.
It can also be a lot of fun to experiment with different art mediums such as acrylic paints, watercolors and colored pens for some wonderful different looks to your colors!
3 More tips to make your cow drawing easy!
Find out how to make this cute drawing even more of a breeze with these tips!
This cartoon cow is done in a really cute style! Just because it looks cartoony doesn't mean you can't use some pictures of real cows to help you when drawing it.
Using a photo online will help you get the proportions of the legs, body and tail looking even better. It will also help with the cow's spots and facial details.
This would also be great if you wanted a more realistic look for this cow anyway. That being said, you could also use this method if you want to keep this cow drawing more cartoony but just need a bit more help!
Using some basic shapes drawn with a pencil would also help to make this drawing of a cow easier to draw. Using your pencil, look at the steps of our guide and then roughly draw the shapes.
These could be a shorter oval for the head and then a longer one for the body. This will help you to make the proportions more consistent.
Then, you can start adding finer details with darker pencils before drawing the final lines with your pen.
Finally, carefully erase all of the pencil once your pen ink is dry. Even the most accomplished artists use tricks like this, so there is no shame in using your pencil to lay some groundwork!
The best way to make this easy to draw cow is by getting a big stack of paper and plenty of drawing supplies.
Just keep following the steps in the guide and the tips we have provided here. If you find yourself stuck, just start again!
Perseverance is the key, and patience is always rewarded in art. No matter how many tries it takes you, you will eventually end up with an artwork you love. People will only see the end result, so there is absolutely no shame in making many attempts before you're happy with it!
Your Cow Drawing is Complete
We really hope that this step-by-step guide on how to draw a cow in 9 steps was a lot of helpful fun for you to use! When taking on a new drawing challenge, it can often seem pretty hard at first.
Our goal with this guide was to make the process of learning how to draw a cow not only much easier but also fun!
By breaking down the task into smaller steps, it can be made so much simpler to learn. Now that you can draw a cute cow, you can personalize your drawing in many ways.
Whether it's with the colors you use, drawing variations or maybe a nice background, the sky is the limit! You should really let your creativity run wild and see what you come up with.
We will be releasing lots of new step-by-step drawing guides constantly, so be sure to check in to our site frequently to never miss out!
Once you've finished your amazing cow drawings, we hope that you will share them to our Facebook and Pinterest pages for us to see!
We always love to see how incredibly creative you all are, and we can't wait to see your cow drawings!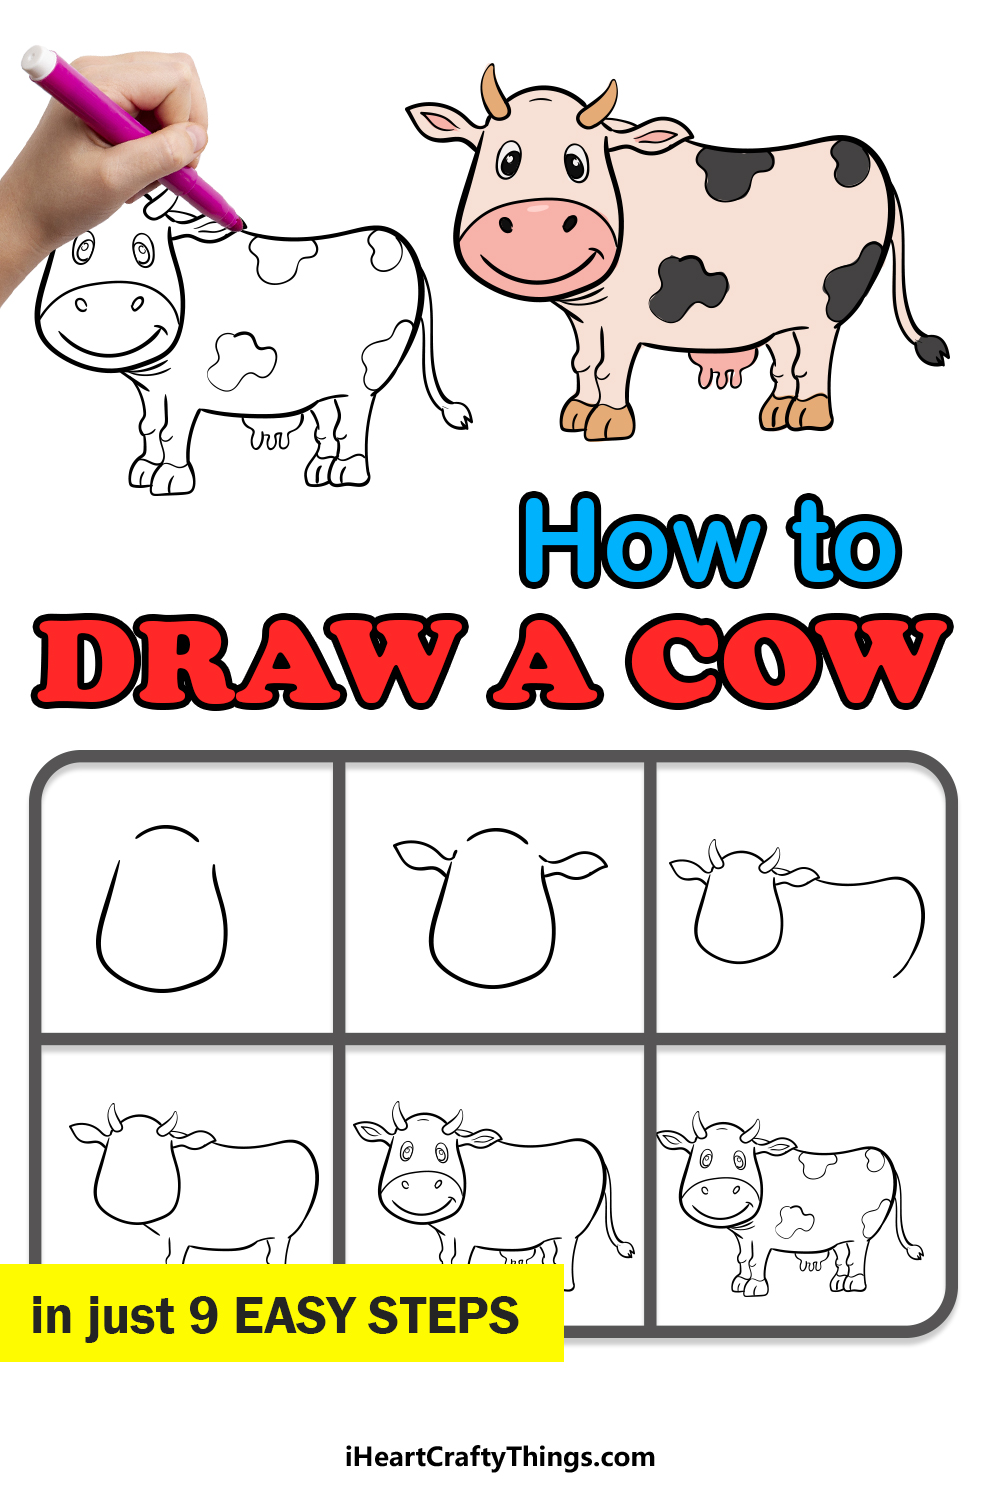
Source: https://iheartcraftythings.com/cow-drawing.html
Post a Comment for "How to Draw a Cow Easy Step by Step"